I Bought a Domain Now What?
This question mostly arises after buying a domain. Even I got this in my mind when I purchased my first ever domain.
There are many misleading websites that will add to the confusion further. This is what happened to me when I entered this industry.
I tried many different steps that are directed by various websites however, all this ended up in despair.
This took a lot of my time and finally I configured the steps that should be followed after buying a domain.
I Bought a domain, congratulations!
Now, what next?
Here is a guide for you guys that will help you take the first step of your journey of establishing your blog with ease.
This article is curated to help all those people who are searching for “I bought a domain now what?”
Buying a domain has established your path of an online presence. Once the domain is bought, the next step is to start working on your website, your brand, and target your online audience.
These might look daunting, however, can be done by simple solutions.
While you will have plenty of help awaiting, the utmost importance is to have a basic game plan which will help you to achieve your goal.
Let’s quickly explore the 8 amazing things to do after buying a domain name to enhance your career opportunities.
- I Bought A Domain Now What – Check Out 8 Amazing Things To Do Next
- 1. Get The Best Web Hosting Plan
- 2. Connect Domain With Web Hosting
- 3. Install WordPress
- 4. Install Attention Grabing Theme & Essential Plugins
- 5. Create Custom Email With Your Domain Name
- 6. Start Adding Content To Your Site
- 7. Verify & Submit Sitemap to Search Console
- 8. Promote Your Site on Social Media Platforms
I Bought A Domain Now What – Check Out 8 Amazing Things To Do Next
Curious to know about what to do after purchasing a domain. Let’s get started without wasting time.
1. Get The Best Web Hosting Plan
The first question arises after buying a domain is whether you want to launch a website on that domain or not?
If your answer is Yes, then you need a web hosting to launch your blog.
If you are new to this market, there are tons of web hosting that are available for free in the market. However, they are not worth it as they make your site slow and add a lot of confusion.
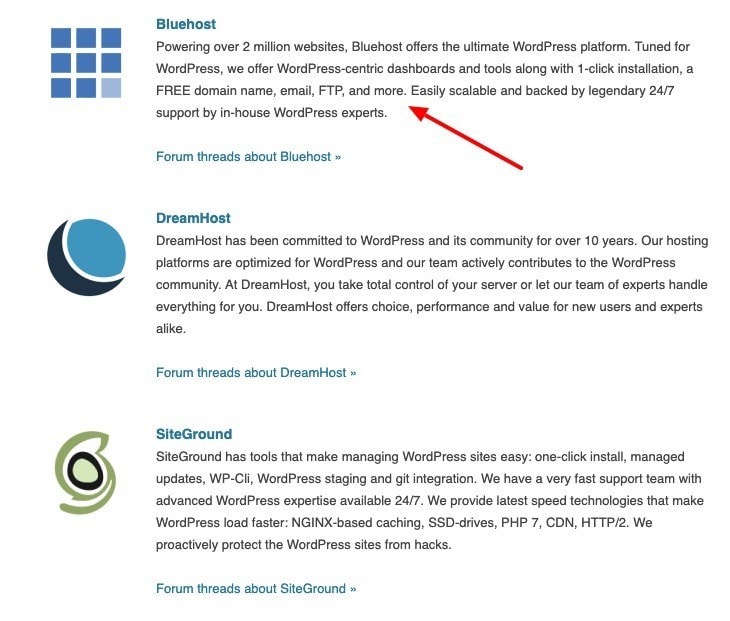
I recommend you to go with authentic web hosting which will help in enhancing the performance of your website such as Bluehost hosting.
Now the question might pop up why Bluehost hosting?
Bluehost Hosting is one of the most recommended web hosting companies by experts.
Even WordPress Officially Recommends Bluehost is Best for Starting a blog. Let me show you what WordPress has to say about Bluehost.
They got their fame for their top-notch customer support and reliable hosting plans. Bluehost Hosting is noticeable faster.
Check out their authentic reviews on Hostadvice.com.
Now, You have a clear idea of How amazing Bluehost is. If you want your site to load fast, with amazing premium hosting features at an affordable price.
Then must try Bluehost Hosting.
The following are the steps that will get you started with Bluehost Hosting:
STEP 1: Click on this magical discounted link. This link will redirect to the website that will showcase plans according to your requirements.

If you are just starting your first blog then go with the basic plan which is 1-site.
And if you already had a domain with some traffic and want to host multiple sites go with the choice plan or pro plan.
STEP 2: There are a few domain options given. Select a domain option that will well suit your requirement.

To register a new domain name with Bluehost hosting, click on Register a new domain. To use your existing domain from another registrar, click on I already have a domain.
STEP 3: Click Proceed. The Configure page will appear.
STEP 4: Here you have to fill in your account details to create an account with Bluehost hosting.
STEP 5: Enter Your Credit Card/Debit Card Details for making the purchase.
STEP 6: After filling in the payment detail you have confirmed the purchase to get started with your hosting and domain.
Congratulations! Now you have both the web host and domain name. You Choose the Best Hosting for Starting your Money Making Blog
2. Connect Domain With Web Hosting
This step can be skipped if you have purchased a hostname and domain name from the same platform. However, if not, this step is inevitable to proceed.
The following are the steps to connect the GoDaddy domain, mostly used domain name provider, to the Bluehost service provider:
For example: If your domain provider in GoDaddy
STEP 1: Log in to the GoDaddy account.
STEP 2: Go to the domain manager section and click on the “DNS”.

STEP 3: Under the name servers tab, click on Manage. Then select the Name server type as custom.
STEP 4: Change the Name server to connect to Bluehost hosting Name server by adding these two names each at a time:
- ns1.bluehost.com
- ns2.bluehost.com

STEP 5: Save it. The domain name is now pointed to the Bluehost hosting server. It takes around 15 minutes to 4 hours usually to get online globally.
Now you are good to go to!
3. Install WordPress
This is the simplest step.
Install WordPress on your domain by going to your hosting account. There will be an option to make WordPress on that. Once the WordPress is set up, you can fill in the credentials and log in the WordPress and access it.
4. Install Attention Grabing Theme & Essential Plugins
WordPress comes with tons of inbuilt free customized designs. These designs are used by most beginners.
With most of the designs freely available, one must think why is it necessary to spend on a premium membership?
To know its answer better, you must know what a Premium WordPress Theme is?
A premium theme is designed specifically for bloggers and digital marketers who are willing to boost their business by paying extra for a better product.
This will make their site look different which will further attract the users.
The paid themes can be accessed on any device or platform. The quality and clarity of the premium themes are not matched with any of the free themes.
Choosing a premium membership comes with the perks of 24×7 customer support and unlimited access.
The Premium WordPress theme will be kept on updating on regular basis. This cannot be experienced while using a free version.
Want To Know Which Premium Theme I Am Using
I am Using affiliate booster Theme on this blog and on my other money making Blog.
The affiliate booster theme is the most lightweight WordPress premium theme with all SEO friendly features. This helps you to take your blog to the next level. Must Try this amazing theme.
Not only Me even many popular bloggers are using this theme for their money making blog.
Here are some of the Premium WordPress themes that I recommend:
- Schema Theme: This theme is also easy to customize. The main feature of this theme is that it is a google search engine optimized.
- Astra Pro Theme: Astra is similar to Generate Press. However, it comes with more features. This can be easily customized by using Elementor.
Here are the steps that will guide you to install the Premium WordPress themes without hustle.
STEP 1: Log in to your WordPress dashboard by providing your credentials.
STEP 2: Go to Appearance -> Themes.
STEP 3: Download the Premium version by selecting the theme and then go back to WordPress dashboard. Click the “Add New” button which is placed at the top.
STEP 4: Click on “Upload Theme”.
STEP 5: Click on “Choose File”.
STEP 6: Let the theme install and then click on “Activate”.
Hurray! The theme is ready to use.
5. Create Custom Email With Your Domain Name
You must be wondering that creating a professional email is still miles away and you will require a techie to do set this up for you. However, this is a task that can be done easily by yourself.
A professional email address is defined as an email that is created by using your company’s name as a domain instead of generic domain names such as Gmail, Yahoo, Hotmail, outlook, etc.
A professional email with your company’s name will help in promoting your business and turning it into the next level. This will ensure more credibility to the user as well as to the visitors of the website.
Let me show you my Custom Email Account.

Here are some of the benefits of creating an email with your domain name:
People nowadays, prefer communicating with personnel who have their business identity rather than those who communicate via their email address.
Sharing professional emails with other professionals will help promote the brand name and company name. This will attract more customers to the website.
6. Start Adding Content To Your Site
The website is nothing without good content. There is no other truth about a website. Thus, it is rightly said that “Content is the King”.
Content is the medium of connection between you and the audience. It is a supreme way of making the audience trust the credibility of the website. It is important to have authentic, well-written content on your website.
Just writing content is not the key to grabbing the attention of the online audience. It is essential to realize how important content is for search engine ranking and converting visitors into potential buyers. The success of any business depends on the content you add to it.
Below are the 3 Main Important things that you need to keep in your mind for the best conversion from your content:-
- Information: The content should provide all the essential information about your topic. The content should be capable of communicating the goals and grounds of your website. The customers who visit your website should be clear about the products and services you provide. The content should rightly convey the information about your product and services that will help in increasing sales and conversions.
- Keywords: Keywords are essential to finding data online. The keywords should be unique for each page. This will help the users to search easily what they desire.
- Call to Action: Adding a call to action feature will enable more conversation such as Grab it now, Add to cart, etc.
7. Verify & Submit Sitemap to Search Console
Verifying your site to Search Console is very important. It will tell the search engines about your site’s existence in the online world.
You can add your website to Google Search Engine for free. The only thing you have to do is submit your website in Google free product, which is known as Google Search Console.
How to Submit Site to To Search Console?
For this, you need to set up a Search console and verify the website ownership. After doing this, the following steps are pretty easy.
How To Submit Website in Bing and Yahoo
If you submit your website to Bing, it will automatically be submitted to Yahoo. For this, you require a tool called the Bing webmaster tool.
This tool can be easily available if you already have the Search Console setup. You need to just import your sites.
In Bing Webmaster choose Sitemaps from the menu, paste in your sitemap URL, and click submit.
This will enable your website to submit in Bing as well as in Yahoo as they both are powered by Wings Index.
8. Promote Your Site on Social Media Platforms
Social media is important these days. Most people spend most of their time during their day on social media.
Thus, if you promote your website on social media, more people will be able to view your content and will approach you for your product and services.
Social media can be a great promotional platform. You will find many reputable, data-driven tools that will help in driving traffic to your website such as Google AdWords, Facebook ads, etc.
Must leverage all the social media platforms for promoting your blog content. Initially, on the new blog, you will not get organic traffic.
In that case, utilizing social media platforms is the best way you have. I am getting a very good amount of traffic from my social media platforms.
So start promoting your content on every social media platform to get amazing traffic.
FAQs For I bought A Domain Now What?
Q1. I bought a Domain Now what?
8 things to do after buying a domain name
1. Get The Best Web Hosting Plan
2. Connect Domain With Web Hosting
3. Install WordPress
4. Install Attention Grabbing Theme & Essential Plugins
5. Create Custom Email With Your Domain Name
6. Start Adding Content To Your Site
7. Verify & Submit Sitemap to Search Console
8. Promote Your Site on Social Media Platforms
Q2. I bought a domain and hosting now what?
If you already have a domain and hosting then you can install WordPress on it and start writing a blog post.
Q3. Where is the best place to buy a domain name?
You can buy the domain with the best domain registrars like Domain.com, NameCheap, Hover, GoDaddy.
Q4. What happens when you register a domain name?
A domain name is your website’s location on the internet.
Wrapping Up
I Bought A Domain Now What? I have answered your query clearly with all the step-by-step guides. So now, you can follow this detailed guide after purchasing a domain.
Now, you don’t need to search this term “I bought A domain Now What” over the internet because after reading this post, you don’t need anything else to start your blog online.
If you found this guide helpful then share it on your social media platforms. Your every share counts. 🙂 🙂
Very well researched article Bhai. As a beginner, people always get confused with this question and you have explained everything very well. Your blog is an awesome place for beginners to learn everything about blogging and you are doing wonderful. Thanks for educating people.
Thanks brother for the appreciation. I am trying my best to provide best values with my content.
Wow Mangesh Sir, Such an amazing article with full detailed knowledge on what to do next after purchasing a domain name.
Anyone who want to learn blogging should visit bloggingqna.com.
Regards
Sagar
Superb Mangesh It’ll Help All The Newbie Bloggers, And Yes Siteground Is Amazing As You Said…
as always mangesh, you make your articles full practical so that even a newbie can follow easily.
Connecting domain with posting is little bit hard for newbies and yu’ve covered it well.
Keep Rocking !!